Monday, October 4, 2010

Eggplants & Red Peppers

Photo379.jpg
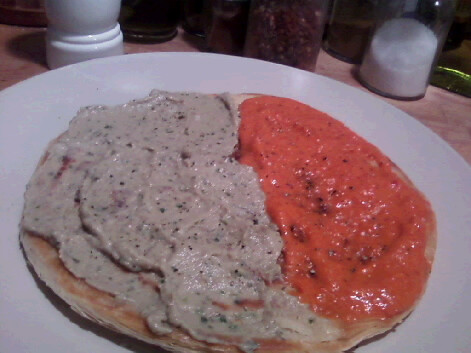
Homemade red pepper pesto & baba ganoush
The CSA box has had some nice big eggplants and red peppers recently.  I am always trying to find simple solutions to make the produce last longer.  Lately that has involved roasting an turning them into dips like red pepper pesto & baba ganoush.

First I cut the red peppers in 3rds, removing all the seeds and ribs.  I put them skin side up on a baking sheet lined with parchment paper and put them under the broiler.  I could hear the skin popping and sizzling as it blackened and blistered.  I turned the pan about half way thru (about the 5 minute mark - will differ with the oven) to be sure all the skins got blistered and blackened.  After removing the peppers from the oven, grab the edges of the parchment paper and toss the still hot peppers in a plastic bag & tie up the opening.

While the pepper are cooling enough to handle, turn the oven down to 350F & put fresh parchment paper on the baking sheet.  I poke 2 eggplants with a knife - 3-4 stabs - lay them on the sheet and into the oven they go for about an hour.

Once the red peppers have cooled enough to handle, the skins slip off without much effort.  Any stubborn bits come off when scraped with the back of my knife.  The soft flesh and any liquid from the bag go into the food processor work bowl.  Next a pinch of kosher salt, a couple turns of the pepper mill, and a splash of olive oil.  I let the food processor do its thing and pulverize everything.  I add a little more olive oil and a couple tablespoons of water to thin it to the consistency I want (it will thicken in the fridge).

I have to give my former upstairs neighbor, Harry, the credit for this recipe.  We would have Shabbat dinners together most Fridays when he lived here in Philly.  It was always super convenient being he was just upstairs and it was a great relaxing ritual for us to reset from the week.  I don't have Shabbat as often anymore with Harry since he and his ever expanding family moved to DC, but when I do make it there it is still a great time with him, his wife, & his two great kids.

I use this pesto on everything!  I spread it on fresh warm malawach.  I toss pasta in it.  I spread it on chicken and bake.  I put it on a sandwich.  It's delicious!  You can store it in a jar in the fridge or you can freeze it.  When I freeze it, I like to do it in an ice tray so I have a few tablespoons to use at a time without having to defrost the whole batch.

Back to the eggplants, once they cooled I scoop the flesh out and drop it in the cleaned food processor work bowl.  I added in a handful of rough chopped fresh flat leaf parsley, 2-3 cloves of chopped garlic, a generous drizzle of tehini, a squeeze if half a lime, a sprinkle of salt & pepper.  With the food processor running I drizzle in some olive oil to thin out the baba ganoush mixture.  I stop a couple time and taste it to make adjustments in seasoning.  Once it's smooth, it goes into the jar & into the fridge.

These are two of my favorite spreads for malawach and sometimes I just can't decide which one to have...


So I don't!
Ess Eppis!
Thursday, September 23, 2010

Delicious Fast Easy Soup

Included in the CSA box this week were leeks & potatoes that just seemed to beg to become soup.  After checking out a couple recipes online, I check out what was already on hand in my kitchen and set to work.  I am sorry I forgot to take photos as I went along... and I ate all the soup really fast!

When I say this is easy... it is EASY!  Plus you'll be eating soup within the hour (including the time to prep the ingredients) - soup made from scratch.  I happen to have thyme, sorrel, & bay in the house.  I love the flavors of thyme & bay together (reminds me of France) & the French Sorrel was something new to me I got in this weeks CSA.  If these flavors don't appeal to you, experiment with others.

If you aren't familiar with leeks, they look like scallions on steroids.  They are the same family, but milder.  They also hold on to dirt like a bugger so you have to follow the instructions to clean them properly.  One bite down on a bit of grit can ruin the whole batch.

Olive oil
4 Leeks
2 lbs. potatoes
3-4 sprigs of fresh thyme - leaves removed & stems discarded
4-5 stems of French Sorrel (from the CSA swap box this week) - stems removed and rough chopped
6-7 cups water
2 bay leaves
S&P

To clean your leeks:
First peel off the outer layer by just pulling down from the top.  Cut off the tough tops (right below where the leaves start to fan out) and the roots at the end.  Cut the leek in half lengthwise and turn the flat side of each half down against the cutting board.  You can cut each half separately if you are more comfortable with that, but I place them next to each other and slice down both stalks together - about 1/4-1/2 inch pieces.  Toss all the sliced leek pieces into a large bowl.  Fill the bowl with cold water so the leeks float to the top with room for the dirt to fall to the bottom away from the leeks.  Separate the rings of the leeks so all the dirt falls to the bottom.  Carefully scoop the leeks out and on to a clean dish towel to drain and dry.

After the leeks are prepped, prep the potatoes.  Peel and dice the potatoes (1/4-1/2 inch).  I use my big dutch oven, but any large pot will work.  Heat up some olive oil in the bottom of your pot (just enough to coat).  Add in your leeks.  Keep heat around medium - you want the leeks to soften and wilt, but not brown.  Add a bit of kosher salt to help them wilt down.  It will seem like a lot a first but as the heat up and you stir it occasionally it will wilt down.  It will take about 10 minutes.  Then add the herbs (I had thyme & French Sorrel) and some fresh ground pepper.  Add in 6 cups of the water.

Add the potatoes & bay leaves.  Cover and simmer the pot for 30 minutes.  Take off the lid and turn off the heat.  I use an immersion blender (but I am sure a regular blender will work, just be careful and don't fill too much and cover the top with a towel before turning on) to puree the whole thing right in the pot.  Make sure you take the bay leaves out first.  If it's too thick for you (it is never too thick for me!), add a some more water, a little at a time till it is at the consistency you like.  Taste and adjust s&p if it needs it.

If you want some potato chunks in your soup, first only add 1.5 lbs of the potatoes and follow the instructions.  Once the soup is pureed, turn back on the heat and add the half pound of diced potatoes left and let simmer for 30 mins.  You'll have a nice creamy soup with little bites of potatoes.

Ess Eppis!

Friday, September 3, 2010

Rosh Hashanah Sneak Peek

This year Rosh Hashanah falls on my grandmother's birthday.  For Rosh Hashanah, she usually has everyone over her house for a New Year's luncheon.  And for her birthday, she usually takes us all out to dinner.  This year I wanted to give her something special for her birthday and make Rosh Hashanah less stress for her.  This year to celebrate her 84th birthday and ring in the year 5771 I will be catering the family celebration at my grandmother's condo.

Here is a sneak peek at the menu for Rosh Hashanah/Grandma's Birthday

Carrot Soup

Moroccan Orange Salad
Vegetable Couscous Salad

Sole Rolled With Veggies (this was originally going to be a potato encrusted sole to use up the surplus potatoes I have, but I think this will stay moister during transport)
Soy Orange Glazed Chicken Legs

Roasted String Beans
Sweet Noodle Kugel
and/or
Salt & Pepper Kugel

Honey Apple Cake
Fresh Fruit

I am also going to make Steamy Kitchen's No Knead Challah (just plain because it has to be a nut free meal).

I think this will be my new Rosh Hashanah e-card...


Ess Eppis and Shana Tova!
SHANA TOVA (שנה טובה) means 'Good Year' in Hebrew.  It's a common greeting during Rosh Hashanah, the celebration of the Jewish New Year - following the Hebrew calendar.

Monday, August 23, 2010

Does Eating Local Really Make a Difference?

I am not going to spout data at you.

I am not going to lecture about the benefits to the farmers or the environment.

You only have to look at the news to see the strongest argument for eating local: The Egg Recall.

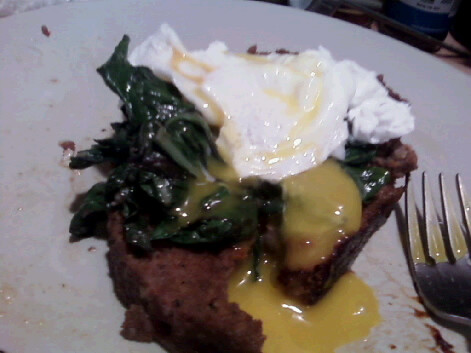
I have lost track of the number of eggs recalled when it started to mass hundreds of millions of eggs.  There was no reason for me to watch for the next batch of eggs being recalled, even though I eat eggs.  I eat a lot of eggs.  I even use them raw on almost weekly basis - making a batch of fresh mayo each week (not that I go thru it all, but I only keep it a week).  And even when I cook my eggs, they are nearly always soft boiled or poached.  I love a runny yolk!

Photo364.jpg
Meatloaf topped with sauteed rainbow chard & a poached egg.

But I know where my eggs come from.  I have met & spoken with the farmers at the farmer markets.  I am not saying that you can ever be 100% any of your food is 100% safe.  I do things to avoid cross contamination in my kitchen even if the chance there is anything dangerous is low:
  • washing hands after handling eggs, or any other kind of animal proteins before touching any other foods or surfaces.
  • using separate & dedicated cutting boards for animal proteins and fruits & veggies.
  • wash fruits and veggies before cutting just in case something is on the surface (who knows how many people at the market touched it before you?)
I still take chances - I have been known to eat fruit and vegetables right out of my CSA box without washing them.  But I know where that food is coming from and I know when it was picked (only 24 hours before I got my grubby lil hands on it!).

Buying local, eating local, and getting to know who is producing your food is good for you!  Even if you don't concern yourself with the environmental, social, economic impact of supporting your local farmers, it will lower the chances you will every have to be concerned with a spinach, tomato, egg, etc recall.  So for your own healthy piece of mind and wallet (how many other people had to dump the eggs they just bought 'just in case' while I was topping my meatloaf with a poached egg?), eat local... plus it makes you a mench.

A MENCH is used to describe a good person: He is a real mench!  It literally translates to 'a person', but is commonly used to call someone a good guy.

Ess Eppis!

Friday, August 20, 2010

CSA Brunch... or quick please eat this so I'll have room for more!

The bounty from the Lancaster Farm Fresh CSA has been great & plentiful!  So plentiful in fact that my fridge seems to be bursting at the seams each week.  The other week it was already coming up on the weekend and soon it would be Tuesday & time for another CSA box.  I needed help, quick!  I decided to throw a last minute brunch for a few friends for a nosh and a schmooze.
NOSH is literally a snack, but if you have ever been invited over for a nosh, you know that the amount of food well exceeds what many would consider a nosh.  If you are NOSHIE, it usually means you are hungry but just looking for a nibble.  To SCHMOOZE is to chat and make small talk.  Nothing is better than a nosh while schmoozing on a lazy Saturday.
Tomatoes and potatoes seemed to be multiplying on their own so I needed to tackle them first.  I found this recipe for Spicy Tomato Chutney.  It seemed full of everything I like so I started that simmering on stove.  It needs about an additional hour simmering to get to a good consistency than is stated in the recipe.

Next I brought out one of my newest toys - the mandoline.  I love this thing!  I sliced down potatoes, red & yellow tomatoes, and onions.  Along with some spices, herbs, and half-and-half (I didn't have cream), I made Spiced Tomato Gratin from 101cookbooks.  This is not a quick recipe, but soooo worth it!  Do not rush thru the caramelizing & spicing the onions step.  This is what makes it amazing!

In addition to the gratin, I also roasted some burgundy beans - which are actual MAGIC BEANS!  My first thought when I got these dark purple string bean was that it would be great to make with kids because when you cook them they turn green!  How cool is that!?  Little did I know how excited my friends would go over this little trick.  All I needed was a lovely assistant as I put the burgundy beans coated lightly with extra virgin olive oil and salt & pepper into the hot oven, only to remove *drum roll* GREEN BEANS!  It was shock & awe!

I rounded out the menu with some quickly whipped up hummus, a (store bought) baguette, a couple of NY Strip Steaks from my U.S. Wellness Meats prize box, and fresh cut cantaloupe - half of which I turned into aqua de melon.   This was very easy, even without a blender.

Hummus
1 cup cooked, cooled, drained chickpeas & reserved water from cooking
2-3 tablespoons of tahini
juice of one lemon
about 1/4 cup of olive oil
salt & pepper to taste

Put chickpeas, tahini, lemon juice, s&p in the work bowl of a food processor with a generous splash of olive oil.  Start food processor and drizzle in the rest of the olive oil slowly.  Let in run 1-2 minutes.  Scrape down the sides of the bowl and taste.  Add s&p as needed.  If consistency is too thick, start running the food processor again and slowly add the water from cooking the chickpeas (if you are using canned, use the water from the can) till you get the consistency you want.  Taste and adjust as needed.

Aqua de Melon
Half a cantaloupe cut into chunks
About 4 cups of water - divided
1/4 cup of sugar or to your taste

The cut up cantaloupe went into the food processor with about a cup of water and 1/4 cup sugar.  Let it whiz around till you have basically made cantaloupe juice concentrate.  Put it into a pitcher and add the rest of the water.  You can make it thicker or thinner depending on how much water you add.

We discovered that this aqua de melon makes an excellent replacement for orange juice in a mimosa thanks to one of my friends bringing a bottle of champagne.

Photo350.jpg


Almost everything was gone by the end of brunching.  Everyone seemed very happy and full... and my fridge was empty (well, just not as full) and ready for the next week's CSA box of produce.  Looks like there maybe many brunches in my future.

Ess Eppis!

Tuesday, August 17, 2010

My New Trick - A Quick Post


TA DA!  I flipped my malawach without dropping it on the floor, stove, or myself!

Malawach isn't Yiddish, it is Hebrew מלווח.  It's a pan fried layer flat bread that is a staple of the Yemenite Jew.  It is very delicious and is a great base for hummus, baba ganoush and other dips and spreads that has made up many of my Shabbat dinners.
Ess Eppis!

Tuesday, July 6, 2010

Week 7 Lancaster Farm Fresh CSA

Week 7 Lancaster Farm Fresh CSA


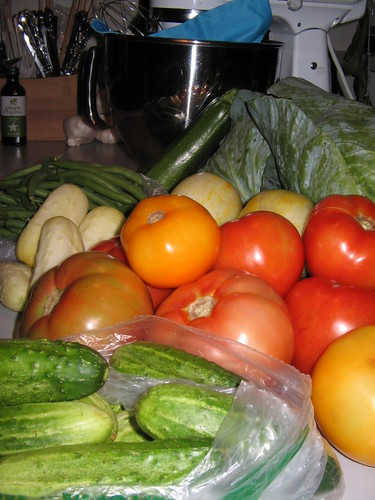
Well it is week 7 and this is the moment I have been waiting for - the first tomatoes of the season!  They are big beautiful red & orange slicing tomatoes.  Oddly, we had 3 shareholders not pick up their share without a heads up... but lucky for me a got a few extra tomatoes & string beans out of it.  The rest of the box contained:

2 lemon cucumbers – certified organic – Elm Tree Organics
1 head green cabbage – certified organic – Green Valley Organics
4 green zucchini – certified organic – Bellview and Rolling Ridge Organics
1 bag red and yellow slicing tomatoes – certified organic – Green Valley Organics
1 bag pickling cucumbers – certified organic – Meadow Brook Organics
1 bag mini-white cucumbers – transitional – Liberty Branch Farm

I also  bought some mint to make some mint iced tea and this drink a friend posted a link to.

It was a long hot day at the CSA pick up site.  I enjoyed the moments I had in the big walk-in fridge.  Today in Philly we hit 102 degrees Fahrenheit.  The whole day I was dreading schlepping all my stuff home from the market.  By time I got home I was schvitzing so bad I was dripping.  It doesn't help matters that I am having air conditioning issues the last couple days.
Today's Yiddish lesson is a two-fer - SCHLEPPING & SCHVITZING.  Schlepping is to lug or carry something, usually heavy, awkward, and/or laborious.  Schvitzing is sweating.  You can also go for a schvitz in a steam room.
Tomorrow I'll be putting up more pickles!  I've got lots and lots of pickles pickling.  In the couple weeks I'll have reports on all the different pickles I am making.  I am experiment with lots of different herbs, spices, and peppers.  Good thing I found those canning jars on sale this holiday weekend when I was shopping with my mom.  I am going to fill them up fast and may need more soon.

Ess Eppis!

Week 6 Lancaster Farm Fresh CSA

Week 6 Lancaster Farm Fresh CSA

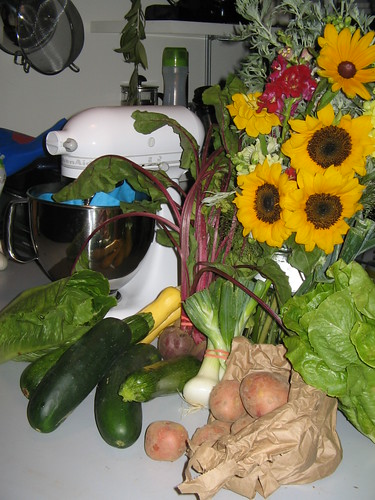
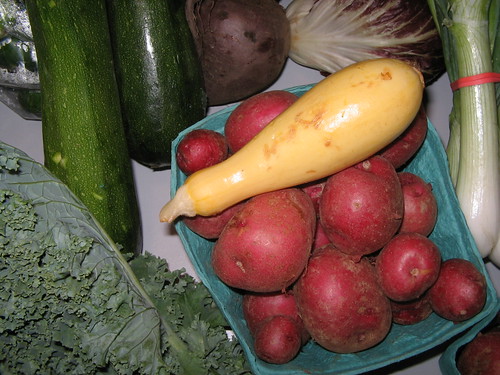
Sorry for slacking... here is last week CSA goodies:

1 bag red-gold potatoes – certified organic – Millwood Springs Organics – 2 lbs
2 green slicing cucumbers – certified organic – Elm Tree Organics
1 bunch cippolini onions – transitional – Liberty Branch Farm
1 bunch Detroit red beets – certified organic – Farmdale Organics
2 yellow straight-neck squash – certified organic – Goshen View Organics
1 bunch spring onions – certified organic – Healthy Harvest
2 hearts Romaine lettuce – certified organic – Riverview Organics

June 26th, Hillside Organics hosted the first of many picnics for the CSA share holders.  It's a really great time to head out to the country, meet the farmers & their families, see where our food is coming from, & eat LOTS of great food.  The picnics are always a potluck.  All the CSA members bring something homemade and yummy.  You could easily tell that delivery everyone received the week of the picnic contained generous amounts of potatoes & kale.

I took a family friend's kid with me to the farm.  We had a sleep over the night before and made a batch of homemade granola bars with raisins, cashews, & almonds for the picnic.  The recipe is adapted from Smitten Kitchen's Thick Chewy Granola Bars.

Picnic Granola Bars

2 cups rolled oats - not instant - 1/3 cup reserved.
1/2 cup raw or turbinado sugar
1/2 teaspoon Kosher salt
1/8 teaspoon cinnamon - I am not a big cinnamon person, if you prefer more go for it.
15 ounces mixed dried fruit & nuts - rough chop nuts and larger dried fruit like apricots or dates
1/3 cup unsalted butter
1/4 cup raw honey - locally produced from the farmer's market
2 tablespoons maple syrup - I have a bottle of locally made organic labeled "dark amber grade A".
1 teaspoon vanilla
1 tablespoon water

Preheat oven to 350°F.  Using parchment paper, line an 8x8 cake pan so it goes across the bottom and up on only 2 sides - leaving two sides uncovered.  Leave the ends of the paper longer than the edge of the pan so you can use it to lift the finished granola out.  Give the pan and the paper a quick spray of non-stick baking spray.
Put the reserved 1/3 cup of rolled oats into a food processor and process till flour-like, approximately 1 minute.  Add to the remaining oats in a large mixing bowl.  Add  sugar, salt, cinnamon, and fruit & nuts to mixing bowl.
Melt butter & raw honey slowly over low heat - do not let it bubble.  Remove from heat and add maple syrup, vanilla, & water.  Whisk together and then pour over oat mixture.  Stir together well so that all the oats and other dry ingredients are are coated with the butter/honey mixture.
Pour mixture into the prepared pan.  Using another piece of parchment paper or wax paper on top of the granola, press down firmly.  Press it down evenly across the whole pan and be sure to make sure it is nice and compacted down.
Bake for 30 minutes or until the edges brown.  Let it cool in the pan for one hour, then use the parchment paper to lift the granola bar onto a wire rack to continue to cool for at least 5-6 hours before cutting.

Because these granola bars do not use any corn syrup (I just couldn't bring myself to add something so overly processed like corn syrup into something homemade & healthy), they will be more crumbly than bars made with it.  I originally made these with "regular" honey, but the raw honey seems to help the bars stick together and they are less crumbly - although both ways tasted great so if you don't have raw honey on hand, don't let that stop you from making these.  They make a great nosh to keep in the house.
Yiddish lesson #2, NOSH.  A nosh is a snack or something to nibble on, but not a full meal.  If someone says they are noshy, it means they are hungry but just for a little (or bissell) of food.

Ess Eppis!

Wednesday, June 23, 2010

Week 5 Lancaster Farm Fresh CSA

Week 5 Lancaster Farm Fresh CSA


This week's CSA box of goodies contained:

1 box new red potatoes – certified organic – Green Valley Organics – 1 quart
1 bag pickling cucumbers – certified organic – Meadow Brook Organics – 2 lbs
1 bunch beets – certified organic – Farmdale Organics
1 green zucchini – certified organic – Bellivew and Autumn Blend Organics
1 bunch spring onions – certified organic – Healthy Harvest
1 bunch green kale – certified organic – Autumn Blend Organics
1 bunch dandelion greens – certified organic – Hillside Organics
1 head butter head lettuce – certified organic – Goshen View Organics
1 head radicchio – certified organic – Bellview Organics

I found a recipe for bread & butter pickles posted by Smitten Kitchen on Facebook for the pickling cucumbers last week.  This afternoon while manning the CSA pick up site, I opened my laptop to find a mouth watering recipe posted on Smitten Kitchen for a blue cheese red potato tart - perfect timing.  The Fair Food Farm Stand carries lots of local sustainable foods, including one of favorite local cheese makers Birchrun Hills Farm (they are at Headhouse Square Farmers' Market every Sunday).  So I picked up some of their blue cheese to make the tart.  I even picked up some broccoli to make more of the Blasted Broccoli I discovered last week.

One of the farms that participates in the Lancaster Farm Fresh Cooperative is hosting a potluck picnic this weekend.  I'll be going with my best friend and a daughter of close family friends.  She'll actually be spending the night before so we can make the potluck dish together.  Any suggestions of something that can be easily packed, transported, and deal with not being refrigerated are welcomed.

Monday, June 21, 2010

The Cabbage & The Cupcake

This is my kind of 6 packEarly in the week I had what can only be described as cupcake-a-paloza in my apartment.  I was trying to create a sampling of different cupcakes & since you can't just make one cupcake (well maybe you can, but I can't), I now have a dozen assorted cupcakes in the fridge ready to eat and 2 dozen more in the freezer.  I think my neighbors are worried I am trying to fatten them, although it doesn't stop them from eating my cupcakes.

Stuffed CabbageIn need of something savory, I grabbed the Napa Cabbage from my latest CSA box.  Its long broad leaves just begged to be stuffed, and I was happy to obliged.  Two pounds of ground beef, some spices & rice made 12 perfect meaty packages.  I cooked them covered in a simple tomato sauce of a can of whole tomatoes blended with garlic.

I decided to give the Blasted Broccoli from Dana Treat a try.  As I said before, I hate broccoli so I didn't really care if I ruined it.  I cleaned the head of broccoli - finding a wee inch worm hiding in the stalks.  I tossed it on olive oil and popped it in a hot oven.  Then tossing it in a bit more olive oil with 3 or 4 cloves of minced garlic and a schtickle of red pepper flakes.  Back into the oven it went to sizzle away.  It actually smelt good.
Here is your first Yiddish lesson - SCHTICKLE.  A schtickle and bissell are similar that they both mean "a little bit", but in cooking a schtickle - a generous pinch - is a bit more than a bissell.
I thought I had really burnt it when it finally came out, but decided to taste it anyway.  It was GREAT!  Garlicky & kind of crunchy, it was perfect.  In fact, after my dinner guest left, I ate all the left overs.
 
Buttermilk cupcakes with berriesSince Masha was coming over for dinner and cupcakes, I decided to also make a salad with the last of this week's CSA lettuce (thank goodness the lettuce season seems to be slowing down).  I made a quick simple vinaigrette & tossed in the raspberries left over from make buttermilk cupcakes with berries.  Masha brought red wine to go with our dinner.  The dinner and the company made the night.

After a couple of helpings of stuffed cabbage, salad, and broccoli (we both agreed that the Blasted Broccoli was simply amazing in the way it transformed this veggie), we were ready for cupcakes.  I had 3 to choose from: banana daiquiri with blueberries topped with a rum glaze, vanilla with dark chocolate chips topped with vanilla chocolate swirl cream cheese frosting, & buttermilk with berries,.  We each indulged in a couple different flavors & Masha left with an assorted 4 pack.

For the stuffed cabbage recipe, click the read more link

Tuesday, June 15, 2010

Week 4 Lancaster Farm Fresh CSA

Week 4 Lancaster Farm Fresh CSA
Click to go to Flickr & roll over photo for details

1 head broccoli – certified organic – Farmdale Organics
1 bunch red beets – certified organic – Farmdale Organics
1 head Napa cabbage – certified organic – Bellview Organics
1 pc summer ball squash – certified organic – Hillside Organics
1 bunch spring onions – certified organic – Healthy Harvest
1 head green butter head (bib) lettuce – certified organic – Goshen View Organics
1 head red leave lettuce – certified organic – Railroad Organics
1 bag cress – certified organic – Back 40 Ranch

And a happy accident landed me a flower share this week.  It is a huge bunch of mixed flowers & greenery.  Some of it looks & smells like mint, but I am going to double check with the farm before trying it just to be safe.

I have never been a fan of broccoli.  I always thought it smells & tastes like farts (well what I imagine what a fart would taste like).  I found a recipe called Blasted Broccoli that quick roasts the broccoli at a high heat with olive oil, garlic, and red pepper flakes.  I have never had broccoli roasted and always roast my other veggies like Brussels Sprouts and asparagus, so maybe this will be the thing that finally brings me around to broccoli.

Tomorrow I'm going to pick up some ground meat so I can use my Napa Cabbage to make a batch of stuffed cabbage.  It's perfect for the crock pot & freezes well so I'll have some for the future.  I am also looking forward to trying a new and exciting recipe for a flourless cupcake using the the sweetness of the beets to keep the sugar added to a minimum.

Tomorrow will be a fun day of baking & cooking in the Ess Eppis kitchen!

Friday, June 11, 2010

Garlic Scape Oil


 With a couple of bunches of garlic scapes from the CSA, some grape seed oil, & a food processor I made a small jar of bright green garlic scape oil.  It was quick and simple.  I think this will work nicely as a finishing oil, in salad dressings, and in marinades.  It will top grilled veggies & meat, hummus, and other foods to add color & flavor.

3rd Lancaster Farm Fresh CSA Share
Click to go to flickr & roll over for details
If you aren't familiar with garlic scapes, it is the top part of the garlic plant harvested before it flowers.  They kind of look like scallions, but tastes like garlic.  They are the long green tendrils in this picture.  They can be used raw, sauteed, grilled, any way you want.

To make the garlic scape oil:

2 bunches of garlic scapes
1 tsp cream of tartar (this gives the green color a little 'kick')
1 tbsp kosher salt
1-1 1/2 cup grape seed oil (I use this because it is nearly tasteless & light allowing the flavor of the scapes to shine)
s&p to taste

Cut the garlic scapes into 2-3 inch pieces.  Add the cream of tartar & salt to boiling water and then drop in the scapes.  Remove them from the boiling water in 1 minute and drop into ice water to stop cooking.  Drain the scapes and pat dry with a paper towel. Place scapes into a food processor or blender with about 1/2 cup of oil.  Turn on food processor and let it run till the scapes are broken up and nearly pulverized.  Add more oil to get the consistency & taste you are happy with.  Add salt & pepper to taste.  I am keeping it in the fridge in an air tight jar.

Week 3 Lancaster Farm Fresh CSA

3rd Lancaster Farm Fresh CSA Share
Click to go to Flickr & roll over photo for details
This weeks CSA share was a another bumper crop of greens:

1 bag snow peas – certified organic – White Swan Acres
1 bunch radishes – certified organic – Friends Road Organics
1 bunch garlic scapes – certified organic – Orchard View Organics
1 bunch green shallots – certified organic – Shady Brook Organics
1 bunch dandelion greens – certified organic – Hillside Organics
1 head endive – certified organic – Meadow Valley Organics
1 head red leaf lettuce – certified organic – Green Valley Organics
2 heads red oak leaf lettuce – certified organic – Back 40 Ranch
1/2 head of Napa Cabbage shared from the other site host's full share

The photo is of my half share AFTER giving half the dandelion greens, half the endive, 1 head of read leaf lettuce, and 1 head of red oak leaf lettuce to Catlyn when she came over for a dinner of BBQ shredded beef over lettuce.  Nearly everything I have been eating has been on a bed of lettuce.  Luckily, it's all really good lettuce!  The BBQ shredded beef from my winning of U.S. Wellness Meats was GREAT!  I loved it so much, I wish I had more.  I am tempted to order more knowing the quality of the food and way it is raised, but I do know I can find quality like this with a local farmer.  If I was closer to network of farms that this impressive cooperative or did not live in an area with access to exceptional farmers, I would not hesistate to regularly order from them.

This weekend I am making a dish for a Paleo potluck.  I do not follow a Paleo diet, but want to participate in the potluck with Catlyn & her CrossFit group.  The idea of swearing off potatoes, beans, and grains makes me shake in my boots - I think my love of those foods is imprinted on my Eastern European DNA.  I have narrowed it down to two possible dishes:

Almond Date Balls Drizzled with Dark Chocolate
Cucumber & Radish Rounds Topped with Garlic Mint Aioli

I just have to decide if I want to go sweet or savory.  Either way, I am sure there will be lots of goodies and new people to meet this weekend.  Only once I figure out what I am making, I then have to figure out what to wear!  Will the decisions never end?!  I think I should mull all this over while a make a cake.

Thursday, June 3, 2010

Veggies, Veggies, & More Veggies

2nd LCFF CSA Delivery
Click to go to Flickr and roll over photo for description of the produce.
2 bunches spring onions – certified organic – Bellview and Plum Hill Organics
1 bunch garlic scapes – certified organic – Life Enhancing Acres
1 pkg white mushrooms – certified organic – Mother Earth Organics
1 bunch Lacinato kale – certified organic – Goshen View Organics
1 bag baby lettuce mix – certified organic – Farmdale Organics
1 bag wrinkle-crinkle – certified organic – Back 40 Ranch
2 heads green oak leaf lettuce – certified organic – Back 40 Ranch
& some Snow Peas that came with the full share that the other hosts of the site shared with me.

I really love being part of a CSA and have written about it in past post.  Being a site host, I get a share for free.  I opted for a half share and the fruit share that starts later in the season.  Even with a half share, I find myself not getting thru all the weekly goodies before they start to waste in my fridge.  This year I am determined not to waste any part of my weekly half share.  The first thing I did was to wash all the produce this week and package it all up so it is all ready to go in my fridge.  To wash lettuce & other leafy stuff I fill the sink with cold water and gently place in the lettuce.  I swish and swirl it around gently.  The lettuce and leafy goods will float while all the soil that may still be on it will sink to the bottom.  I gently scoop out the greens and dry them in a salad spinner, then lay them out on paper towels to get any left over moisture.  Then I package them in ziplock style bags or the reusable containers my take out Chinese comes in.

The best part if a CSA is that you end up with produce you have never tried or even heard of.  This week I got something called wrinkle-crinkle.  It's a cress that looks like slightly sickly parsley, but is very peppery.  I discovered this after tasting a leaf while cleaning all the greens.  Unsure of exactly how to use it, I decided to treat it more like an herb than a lettuce.  I chopped it up and added it to some pasta, tomato, garlic, and Parmesan cheese.

The bag of mixed baby lettuce has provided a nice addition to nearly every meal.  I made a quick and simple vinaigrette by whisking together a splash of apple cider vinegar, a squirt of Dijon mustard, and s&p to taste.  I keep whisking as I drizzle in some olive oil - about twice as much as I have acids.  Some canned tuna on top of some dressed greens with an extra drizzle over the tuna and I had a meal!  A left over cupcake from the weekend baking rounded it out to complete the meal.

While cleaning the produce I decided to also clean and blanch it so I could keep it in the fridge to snack on.  It never made it to the fridge.  After cleaning - pulling that fibrous string along the edge, I dropped them into salted boiling water for just a minute.  They turned bright green and stayed crunching after dropping them in ice water to quickly cool them.  After testing one, I ended up eating the whole container of the sweet crunchy snack.  They were so good I think I am going to go back to The Fair Food Farmstand at Reading Terminal Market and pick up some more.

Tonight I plan on making Kale chips.  I am going to try experimenting with some flavored salts that I won from goodLife{eats} give-a-way.  I have lavender rosemary & cherry pistachio Secret Stash Salts, in addition to my standard Kosher salt.  Maybe I'll try some different spices too.  I think the smoked paprika might work nice to give a bbq chip taste, but healthier than potato chips.  I'll post how they come out soon.

Friday, May 28, 2010

I'M BACK... and with Mac & Cheese

I am not sure if enough people read this yet to have noticed, but I was away for a bit.  I took a road trip to FLA with my parents to visit my brother, sister-in-law, & niece in Orlando and my cousin's graduation in the West Palm area.  Two weeks on the road & in hotels with the family and we all survived!  Mostly thanks to the super swanky digs my brother booked for us... having a brother who works for Loews has its benefits.  He even got us the hospitality suite at the Royal Pacific where he works.  Everything at the Royal Pacific & Portifino is first class and I'll be posting soon about all the goodies we were treated to during our stay.

I came back in time for a couple of real special goodies here.  From goodLife{eats}, I won a $75 variety box of meats from U.S. Wellness Meats.  It was a big meaty present of NY Strip Steaks, Free Range Chicken Breasts, Shredded BBQ Beef, and Nitrate Free/MSG Free Beef Sticks & Summer Sausage.  I also got a jar of Cherry Pistachio Salt by Secret Stash Salts (and a small baggie of Lavender Rosemary Salt).  On top of all that, I was just a couple days away from my CSA's first delivery!  It was an awesome welcome home!

The first thing I tore into was the beef sticks and they were tasty.  Tonight I made one of the four chicken breasts that came in the pack with lots of CSA & farmers market goodies.  I made chicken lettuce spring rolls and asparagus & tomato mac & cheese.  The mac & cheese looks darker than the average mac & cheese because I use a cheddar cheese that is made with Guiness Beer & I add in tomato paste to give it some extra tomato flavor.


ASPARAGUS AND TOMATO MAC&CHEESE
(measurements are only approximations)
1/2 lb whole wheat elbow macaroni
3 tbsp unsalted butter
1/4 cup unbleached all purpose flour
2 tbsp tomato paste
1 1/2 cup 2% milk
1/4 lb Cahill Guiness Cheddar grated (it was all they had left at Salumeria in RTM - I love this stuff!)
1 1/2 tsp smoked paprika
1/2 tsp cayenne pepper
1/2 pint grape tomatoes halfed
1 bunch asparagus cut in about 1-1 1/2 inch pieces
salt & pepper to taste

After tossing the macaroni in about 5 cups of boiling water, start the butter melting in a good sized saute pan (I use this oven safe pan from IKEA - so later I don't need to dirty another pan) over med/high heat.  Also preheat the oven to 350.  Stir in  the flour to the butter and let it cook for a few minutes (you just made a roux!) and then stir in the tomato paste, cooking another few minutes.
The macaroni should be ready to be drained about now.
Slowly stir in the milk into the roux.  Once the milk is fully incorporated into the flour add the cheese and stir gently till it completely melts.  Add the spices and salt & pepper to taste.  Fold in the drained macaroni and then the tomatoes and asparagus.  Gently fold together till mixed evenly.
If your pan is oven safe pop it in the oven for 30 minutes.  If not, put it in a baking dish then into the oven for 30 minutes.

CHICKEN LETTUCE SPRING ROLLS
1 chicken boneless skinless chicken breast slice into 1/4 inch thick strips
1 tbsp olive oil
1 lime halved
1 red bell pepper
2 medium carrots
4-5 scallions
handful fresh cilantro rough chopped
1 tbsp seasoned rice wine vinegar
1 tsp soy sauce
1/2 tsp toasted sesame oil
1 head green leaf lettuce
kosher salt & pepper

Season the chicken with salt & pepper.  Heat olive oil in a pan over high heat.  Add the chicken to the pan.  As the chicken cooks squeeze half a lime over chicken.
While the chicken cooks, peel the pepper & carrots with a vegetable peeler.  You won't be able to peel where the pepper curves in so use that curve as the natural line to cut the pepper.  The pieces will come apart easily and you can peel the bits of skin left.  I also like to remove all the ribs - the peeler works nicely on that too.
Chicken should be just about done.  When it is, just put it on a plate and set aside.
Julienne the peppers and carrots by cutting the peppers into thin strips long ways.  Slice the carrots on an angle and then stack the slices and cut down the stack to create "match sticks" (or you could grate the carrots with the biggest grater holes).  Slice the scallion into small rounds (about 1/4 inch) all the way up the greens.  Toss the veggies & the cilantro in a bowl and add in the vinegar, soy sauce, & sesame oil and toss to coat.  Adjust the seasonings and salt & pepper to your taste.
Cut the base on the head of lettuce so all the leaves are free.  Gently rinse & dry (best in a salad spinner).  Holding a leaf in your palm, add in the veggies and then the chicken.  Fold over the sides of the leaf.

And now... ENJOY!

Tuesday, May 4, 2010

Bad Day/Good Cupcakes


My day started at 5:30am when I was woken up by a wicked bout of heartburn.  Next I missed the bus to South Philly, leaving me to wait in the rain for the next.  Finally at my volunteer gig, the seniors were more ornery than usually, leaving me dazed as I left.  And just for good measure, just a few blocks from my apartment building I lost my footing on some uneven sidewalk and went down like a sack of potatoes... lovely.

I finally got out of the hot sticky weather and into my cool safe apartment about 2pm.  I vowed not to leave my apartment for 24 hours till what ever hex that was plaguing me had passed.  I needed a project that was guaranteed to bring happiness and joy - CUPCAKES!  One small issue, I swore not to leave my apartment for fear that I would end up chased down to the Delaware River by a rabid pack of pit bulls (this is Philly so it is within the realm of possibilities) and I had no eggs or milk for my batter.  This is where bribery comes in very handy.  Using the promise of cupcakes, I was able to obtain a couple eggs & some milk from Dan.

I made a simple vanilla cupcake batter (upping the vanilla extract to a tablespoon) and mixed in mini dark chocolate chunks.  In 20 minutes they rose up nice and light & fluffy with dark chocolate specks.  For the frosting I was torn between a classic butter cream and cream cheese frosting.  That's when I realize - I didn't have enough confectioner sugar for any frosting.  I would have to go to the corner store if I wanted to frost my cupcakes (and is that really optional? no way!).  I was convinced that with the way my day was going I would end up walking in just as the place was being robbed.  Luckily I was able to get to the store and home without indecent.

I decided to make cream cheese frosting and leave some plain, and add coco powder to some.  I added both batches to the pastry bag to pipe onto the cupcakes giving them a nice chocolate/vanilla swirl effect.  The frosting was very easy:

Let a stick of butter and a brick of cream cheese come to room temperature and drop them into the mixer bowl.  I whipped it up with the whisk attachment.  Then I added some vanilla extract and a touch of milk and whipped it some more.  I slowly added the confectioner sugar until it was as sweet as I wanted it.  Then I scooped some out before adding the coco powder & whipping it into the frosting.

And as an added bonus, after frosting 20 cupcakes, I still have a bunch of frosting left over.  I'll have to think of something creative & yummy for the leftovers.

After a cupcake or two, tomorrow is looking a lot brighter.

Friday, April 30, 2010

I Love My Orb!

One of the few things that wouldn't be in my apartment was ice.  I have a small studio apartment and a small studio apartment kitchen with small studio apartment appliances (maybe after cleaning it today, I will post a picture or two).  I even have my prettier stone cookware stashed on bookshelves for lack of space.  Putting an ice tray in my freezer always seemed to take up too much space and I always keep my Brita pitcher in the fridge, so I never had ice (usually to Catlyn's dismay).

Well those days are long gone because I now have the IceOrb by Fusion Brands.


This container is both the ice tray & ice storage.  There are so many things I love about my Orb:
  • The whole thing is a sealed/covered ice making/storage system.  This is great cause the ice does not pick up food smells/tastes, no spillage if something else in the freezer hits it (or if you are like me and you had an issue walking from the sink to the freezer without leaving a number of puddles).
  • It has a very small footprint.  It barely takes up more room than a pint of ice cream.  And because of the cover, you can even stack things like your pint of ice cream right on top unlike traditional ice trays.
  • It is multi-functional.  While it is a ice tray & storage system, the inner container used for ice storage perfectly fits both wine & champagne bottles to chill.  The container can also be used to hold foods that you want to keep chilled - just keep in mind when transporting, the lid isn't super secure so make sure you take precautions.
  • It just looks plain old cool.
It does take a little getting use to.  When you are popping the container out you have to have patience& work slowly pushing from the bottom while pulling the overlapping lip gently after you give it a couple squeezes around the container to break the ice between the outer chamber and the inner container.  The only people I would not suggest this to are people who have strength issues with their hands like arthritis or those with very small hands - you have to be able to push on the bottom while pulling back the lip at the top.  I am 5'4" and have proportional hands and I have no issue.

I have one lil suggestion to those interested in getting their own Orb - fill it below the fill line.  I found that filling it below the fill line that left a little unfilled room in the bottom row of ice chambers fills it just perfect without any spillage when popping back in the blue inner container.  The top row of ice chambers will appear to have unfilled room, but once the water expands when it freezes, it will fill (or almost) in that last chamber.

Just to be clear about this review.  I bought my own IceOrb on Amazon (initially feeling silly for spending that for an ice tray, but now think it was totally worth it!) and was not and have not ever been in touch with Fusion Brands (or Brita for that matter).  They do have some other interesting (and very coolly designed) products I am interested in.

Tuesday, April 27, 2010

The most important 90 minutes you can spend in the next 24 hours


If there is one thing I believe in when it comes to food, it is know what you are eating. Talk to the people at your local farmer's market, ask the butcher questions, read labels.  Can you identify the items listed in the food you eat?  Could you eat each of those ingredients on their own?  Lately I have been on a mission to make most of my food from as base ingredients as I can.  I find great joy in handling and inspecting the quality of each individual ingredient going into my final product.  I strongly believe in eating locally grow foods and farmed animals.  I am far from achieving a completely "whole food" existence, but every small step is important (in my eyes... and stomach) to me.

Anyone who knows me knows I am not nor will ever be a vegetarian or vegan... I like meat and feel strongly that I could & would take down a cow with my bare hands should it ever come to that (here's to hoping it never comes to that - but if it does, as long as I could find a chicken I can make a mean beef tartare).  This movie, Food, Inc. is not about preaching or making anyone stop eating anything that is out there.  It is about educating.  It is about letting you, the consumer, what choices are out there.  And most importantly, it is about educating the consumer about their own power in this market place & how to exercise it.  Even when covering the ugly side of food production, it is not overly gut wrenching - it is just simply the truth about where your food comes from (it does not magically appear wrapped up neatly in plastic).

Please take 90 minutes to watch this now by clicking this link.  Thank you.


Monday, April 26, 2010

Monday, April 19, 2010

A Day on the Farm


I've been a member of Lancaster Farm Fresh CSA for a couple years and this summer I am a volunteer working with them.  CSA stands for Community Supported Agriculture.  When you become a member in a CSA you are essentially buying a share of the farm.  By paying for your share of the season's harvest up front, local smaller farmers have a cash flow that allows them to concentrate on the land.  It also connects you to your local small farmer in a way that goes well beyond what you get even at a Farmer's Market.  You get to know your farmers and follow their harvest.  Their successes and their failures - and a stronger understanding what the real people impact those failures have.  I remember one year I didn't see one green pepper in all season because an entire field of them was wiped out in less than one day by a hail storm.

Those not familiar with CSA, the way most work is that the farm deliver boxes of produce to select pick-up points each week where members come and pick up their goodies.  Some CSAs have pick ups right at the farms for those it is convenient for and I have seen those kinds of CSAs also have pick-you-own for those members who want to get their hands dirty.  I would love to take advantage of one of those one day, but I a tried & true city dweller - I haven't even owned a car in over ten years (which is why mom drove me out the 2 hours to our destination).

This year I will be helping man one of those pick-up locations in Philadelphia.  A bonus for volunteering my time is that I got to go out to Lancaster, tour the warehouse, & meet some of the farmers who provide the organic and delicious produce.  I believe the farmers we met, Aaron & Levi, are Mennonite (although may be Amish - I am not so well versed in differences).  Being that I grew up & now live not far from "Amish Country" and shop regularly at the Reading Terminal Market (where a number of Amish have farm and food stands), I am somewhat ashamed that I know so little about the culture and have had almost no interaction with individuals of either faith.  I remember going to Dutch Wonderland with my parents and seeing the Amish children playing just like my brother and me, just dressed very differently.  I really enjoyed meeting the farmers.  I don't know why I was surprised that they were personable and gregarious.  They and the land they worked gave off a relaxed happiness... everything just seemed to be in its place - the people, the animals, the crops - all creating a symbiotic harmony.  One really cool characteristic of both Aaron & Levi is that while they live & work in ways steeped in tradition, they are both very innovative while still honoring and staying true to their traditions.  Both have created ways to improve on harvesting, cleaning, and packing on their farms.

Mom & I had noticed a number of bbq's setting up on our way to the warehouse.  Seems Lancaster a number of oranizations run Saturday bbq's as fundraisers.  On our way home we stopped at a local fire company to pick up some freshly bbq'ed chicken.  The smell was wafting across the streets we were driving and we just couldn't resist.  We pulled up and they even brought the chicken right to our car.  When I got home I couldn't wait to tuck into it.  The meat just came right off the bones, the skin was crisp and tasty.  This chicken may even be worth the hour and half drive from the city.

That night must have been one of the noisiest nights in a long time.  The guy downstairs was having a birthday celebration (which he gave me a heads up about, but once it hit 3:30am I had to txt him a request to bring it down) and the kids in the dorm across the way were just going more insane than normal.  I couldn't help but wish for the calm of the country.  I actually looked up rent for the area... seems I could get a large 2-3 bedroom with a yard for what I am paying now in rent.  Of course I'd need a car and I wouldn't be in the city, but at that moment I was ready to go.  I even looked up synagogues in the area and to my surprise there is both a reform & conservative synagogue.  I don't know if I could handle living out in the country, but I could have the chickens and goats I've always wanted.  Maybe one day.

Here are some great resources to help you eat local in the Philly area.  If you live outside Philly, just Google the following for your area: CSA, Community Supported Agriculture, buying clubs, and farmers market.

Farm to City
Farm to Philly
Food Trust
Philabundance

If you have any questions about being involved with a CSA or anything else about eating local, please feel free to post your questions here or email me.  Even if I don't have the answers, I will try to point you in the right direction.  Eating local is something I really believe in.  Knowing where your food is coming from and who is producing it is important to me.  I rather eat food produced on a small farm where I can ask the farmer at the market how the food is grown or the animals raised than food produced on a huge "factory" farm with a generic "organic" label on it.

Wednesday, April 14, 2010

Passover is Over Pizza Party

To celebrate the end of Passover, I invited over some other Members of the Tribe to indulge in lots of bready goodness.

I made pizza, hummus, bruschetta, spicy tequila popcorn, and sweet noodle kugel with dried fruits & nuts.  I had planned on making the bread, but Metropolitan does such a great job and their baguettes so reasonably priced how could I resist?  Since I never buy beer (don't like it), Dan brought the beer - Dan always brings the beer.  Ilya brought fresh strawberries & soft chocolate chop cookies.  After the savory was enjoyed I washed and cut the strawberries and put them out with some warmed Nutella.  Even with homemade pizza proceeding it, the 30 second nuked Nutella and strawberries stole the show.  There was also lots of great wine brought by guests.  All was good, but the Genesis brought by Greg & Annie was a stand out.

The pizza was a pretty big hit.  I was very happy with the way it came out.  I like plain cheese pizza so there were no fancy toppings - the pizza itself was the star and need not fancy dressing to shine (in my no so humble opinion).  The recipe I use for the dough is the result of trail and error of many tries combining a number of different recipes & techniques to give me the results I wanted.  Greg & Annie were asking about it because they had made pizza, but apparently their crust was so tough it was difficult to bite thru.  Discussing methods we quickly figured out the biggest difference was the kneading of the dough - I don't knead the dough.  I am not an expert on the science between how kneading releases the gluten in the dough, but I do know that too much kneading will make your end product tough and breads won't rise as nicely.  So this is my recipe for my pizza dough.  There is one caveat - you have to plan ahead at least one day.

Pizza Dough
Toss the following into the food processor work bowl:
  • 1 3/4c all-purpose flour
  • 1tsp sugar
  • 1 1/2-2tsp kosher salt
  • 2 1/4tsp yeast (one package)
Before you start mixing, set up the following:
  • a bowl with 1c of flour
  • 3/4c of really really warm water - tap is fine, let it run and get almost HOT - should be around 120-130F (49-55C) if you have a thermometer
  • add 1 tbsp of olive oil to the water
Turn on the food processor, let the dry ingredients mix for a second or two and then pour in the water/oil.  If the dough seems sticky or not forming into a ball within 20-30 seconds, slowly add more flour until it does.  You won't use all the flour, so don't try.  Use some of the left over to flour your counter top.  Turn the dough out.  Knead gently a couple of times.  Does it stick to your fingers?  Difficult to work with?  Add a bit more flour - slowly & a little at a time.  Knead the flour in gently and form into a ball.  It will be a bit sticky, but should form a pretty smooth ball.

Now toss it into a ziplock bag and pop it in the fridge for at least 24 hours.  I am not sure what it is, maybe the slow rise keeps it tender, but this makes the best thin crust pizza dough.  This dough will keep up to a week in the fridge.  It will actually develop even better flavor the longer it is around.  You can just pull out what you need.  As long as you let it set in the fridge for the first 24 hours, you can also freeze the dough for a couple months - let it thaw in the fridge.  But honestly, there is very little chance you'd have any left at the end of the week to worry about freezing for later. 

Now you are ready to make your pizza...


Monday, April 5, 2010

as promised... the ugly.

This is a macaron


Catlyn made this macaron.  Her first batch & first attempt.  It is what a macaron should look & taste like.  The smooth doomed cookie and tasty filling.  And they have feet!  See that lil ruffled edge of the cookie?  That is what makes this a proper macaron.  You get this by letting the meringue & almond meal cookie set out and get a skin before baking.

As you can see I am well versed in the concept of macarons.

Unfortunately knowing the concept of macarons does not translate into the ability to make macarons.  The following are picture from my first TWO failed batched of macarons.  The first of which looked amazingly like peacock poop, just lighter in color.  I know this because I worked a season at The Philadelphia Zoo and the place is lousy with free wandering peacocks.


We will never speak of this again.

Saturday, April 3, 2010

Seder at Zahav

Before I get to the review of our (Catlyn & me - ain't she purdy!) Passover dinner, I really like Zahav and will definitely eat there again. Unfortunately the Passover dinner this year was a disappointment. I think mostly because I have eaten there in the past and know what they are capable of, and this fell short in my eyes (or mouth).

I'll start with the good:
  • On the starter salads that you get there is a salt roasted beets with tahini & toasted walnuts... one word AMAZING! I think it's the tehini, which I found out is made in house (impressive), that gives it this unique creaminess that is simply wonderful. All the salads were tasty. I am not normally a tabouli fan, but enjoyed theirs.
  • The grilled asparagus with soft boiled egg was fabulous. Two of my favorite things paired.
  • The leek fritters with charoset was delish! I could have been very happy with a basket of those fritters and a bowl of the charoset.
  • The dessert of matzoh brei (not really, but good none the less) and wine spiced ice cream was a great ending.
The bad:
  • I hate hate hate to say this... the hummus was bland. Needed either more lemon or garlic (maybe both).
  • They put a spice mix in the matzoh balls that includes cinnamon & nutmeg. They served them in a black broth with garlic. The overly salty savory broth (tasted kinda beefy - would have been good with less salt) did not combine well with the somewhat sweet spices in the matzoh balls. I LOVE matzoh balls - my father and I have had full out knock down races to the kitchen when it is announced "one matzoh ball left" at Seders (usually ending with him pulling rank) - but I couldn't even eat these. This is just my opinion, maybe because they are such a strong part of my tradition.  Catlyn seemed to enjoy both our bowls of soup & matzoh balls, still noting that it was pretty salty.
  • The fish was good, but over powered by the beet & horseradish mixture served with it. It also needed more horseradish - it was barely detectable & with freshly grated that is a hell of a feat! While the white tuna was lovely, a more substantial fish was needed for the dish or a different condiment all together.
  • The coffee braised brisket while good, was a pale comparison of the one from last year that still holds a special place in my heart a year later (this entire night out was because we had the brisket last year and fell in love with it).
It was let down from last year, but I know that on the whole it is a great restaurant and this is just a blip in my experience there.

Wednesday, March 31, 2010

Brisket & Brei

I might miss a lot during Passover like  pasta, beans, rice, pizza, but there are lots of Passover goodies that stand out.  This year I made the Passover dinner for my parents & grandma.  It was a small & relaxed dinner, but just like any good Jew I made enough food for a small army.

Anyone who knows me knows that my favorite vacation ever was to France and I LOVE anything French, so it is no surprise I Frenched up my brisket this year.  Schlepping my cast iron dutch oven to New Jersey to make le Daube Provençal De Boeuf Brisket as part of the dinner was worth it!  I loved the way this came out & come colder weather this well reappear on my list of fave comfort foods.  Imagine using a beautiful piece of brisket to make a beef stew.  Browning the brisket first.  Cooking the carrots, onions, & garlic with tomato paste, and then stirring in a whole bottle of bold red wine.  Nestling the brisket back into the pot below the rich wine.  Before popping the whole thing in the oven to cook for the next 3 hours add the very French flavors of thyme, bay leaves, Niçoise olives, & thinly sliced orange rind.  I made a couple of adjustments for Passover - no flour & no salt pork - but it didn't suffer for it.  The brisket was tender and flavorful.  I served it over the Passover Gnocchi, but it really over powered the delicate pillows of goodness.  They really are best left to simple sauces that let them shine.

I also made coriander ginger orange braised chicken - one of my fave chicken dishes.  Side dishes green & white roasted asparagus & stuff derma.  My chicken soup & matzoh balls came out yummy - using a recipe from an Italian Jewish cookbook making matzoh balls with olive oil & some of the chicken from the soup.  We did have to scrounge a bit to come up with enough (4) bowls for all of us... mom & dad have been packing everything away in anticipation of moving soon (hopefully).  I did away with the traditional gefilte fish and made a poached tuna in endive cups with a homemade horseradish aioli... everyone but dad liked that.

After many failed attempts as French macarons, mom & I decided to make a simple dessert of cut fruit and chocolate dip.  Grandma brought a small packaged apple kugel that was great.  Heated up in the microwave, it tasted very strudel like - only missing some of the sweet white icing drizzled over it.

It was a successful dinner, except that I am messy.  Things were going well, it seemed to stay under control while I was home by myself, but towards the end there I seemed to lose control and the kitchen turned to a mess.  Luckily since I cooked, dad did most of the clean up while mom & I took grandma home.  I forgot to mention that the bottom of my dutch oven is forever stained - he scrubbed and scrubbed and scrubbed.

The next morning before dad took me home I smelt my favorite Passover tradition (well besides that whole "you have to drink 4 cups of wine thru dinner" thing), Matzoh Brei.  For those not in the know, Matzoh Brei is matzoh that has been broken up, soaked in hot water till it becomes just soft enough, mixed with a beaten egg or two, & then fried in a pan.  Ok, you may be thinking, soft matzoh & egg whatever... but when it is done right it is great.  The real trick is the whole water part - not enough and it's not soft enough, too much and its soggy and gross... it is a fine line.  My dad's has always been the best & he had made a bunch for mom & me in the morning.  YUM!

How was your Passover Seder?

Thursday, March 25, 2010

The Good (the bad & the ugly will come later)

The last couple days I have been happily toiling away in my kitchen.  I have been working on some new recipes for my family's Passover dinner on Monday.  I have had some successes and some failure.

In my search to make something different, I came across this blog.  In the Israeli Kitchen, Mimi has a recipe for Passover Gnocchi.  Now, to anyone out there that has been celebrating Passover all their life, this sounds like some taunting urban legend - and that's what I thought.

There are a lot of things I miss over Passover: bread, beans, Cheerios, oatmeal, pizza, rice, & of course pasta.  When I came across Mimi's recipe I figured, what the heck, I have everything on hand.  I had never made gnocchis and heard stories of how difficult they can be to make.  I don't know if it is the use of the matzoh cake meal & potato starch that helps make them light & fluffy, but they were.  They were easy to make.  Smelt like matzoh balls when I took the rested dough out of the fridge.  And YUMMY!  After boiling for only 3-5 minutes, I tossed them in a pan with some tomatoes and olive oil, tore up some basil over top, and it was good to go.


I actually made two batches already.  The first, while good, were way too big.  I wasn't aware they would poof up so much when they cook.  My next batch was much better sizewise.  I also perfected my gnocchi forming skills on the second batch.  Here are my tips on making these:
  1. Make them smaller than you think you should.  As soon as they hit the water they will fluff up to little pillows of goodness.
  2. To form the gnocchi with a fork I first pressed the fork lightly into the gnocchi on the counter, then flip the fork over, & with my other hand used my thumb to flick (lightly)/roll the gnocchi off the fork tines.  Once you get the hang of it, it goes really fast.  If you are doing it with a kid, I think just pressing the fork in would be a good job for them.  The rolling of it is just what I prefer.
  3. Start boiling your water right before you pull your dough out of the fridge.  These really are best made & served fresh and best not to let them sit around.  Also have any have your sauce ready before they go in the water... they will be done before you know it.
  4. Make the gnocchi on parchment paper.  Doesn't just make clean up easier, but if you are like me and you have a small kitchen & aren't making the gnocchi next to the pot of water it makes transporting and dumping in the pot much easier.
Yesterday I made a nice easy tomato sauce by tossing a couple tomatoes and garlic into the food processor.   Added tomato paste into a hot pan with olive oil and some crushed red chili peppers.  As the gnocchi floated to the top and boiled for a few minutes, I just scooped them out and dropped them in the simmering sauce.  Yummy!

My other big success this week... AIOLI!  I made actual aioli.  For anyone who doesn't know, aioli is fancy French mayonnaise flavored with garlic and/or other herbs.  It takes a long time & lots of patience, but totally worth it.

First I dropped 2 egg yolks into my food processor.  Because you are using raw eggs, it is best to use the freshest eggs you can find (I also wouldn't suggest this for anyone like the very young or old that shouldn't eat things like raw eggs).  I added in some salt, pepper, juice of 1 lemon, and 2 cloves of smashed garlic.  I filled my measuring cup with about 1/4 cup of olive oil and 3/4 cup of grapeseed oil (this oil is light and has no taste - great for dressings).  And now the patience comes in.  I turned on the food processor and began adding the oil drop by drop.  This is NOT an exaggeration!  The oil must be added SLOW, literally drop by drop for it to emulsify with the egg yolks to create the aioli.  It takes a long time, but when you see that creamy mixture come together and really start to look like you finial product it will be worth it.  Do not be tempted to pour in the oil, you'll only have a sloppy mess.

There was only one little problem, which luckily didn't occur till the very last moment.  The food processor stopped.  It didn't slow down, it didn't make a noise... it just came to a dead stop.  Luckily I was at the very end and after an hour or so of cooling off it seems to be working fine again.

I was so happy with the thick aioli.  After tasting for flavor, I added in some mustard (both Dijon mustard & powdered mustard - I like mustard) and horseradish.  I let the flavors meld together over night.  I am very happy with the end product... not only good for sandwiches and the tuna dish I have planned for Passover dinner, but it was perfect for dipping fries.

So those were my big successes... next up, the FAIL.